.jpg)
Terrarium, Vivarium & Aquarium
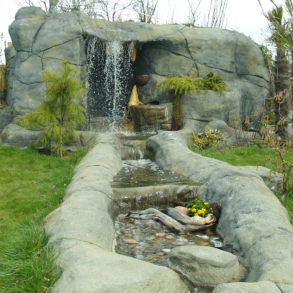
Create Naturalistic Backgrounds and Features for Your Terrarium or Aquarium
MakeMake® ConcreteClay™ offers an accessible way for hobby keepers to build realistic backgrounds, hides, cliffs, caves and decorative elements for terrariums, vivariums, and freshwater aquariums. The material is easy to sculpt, attach, and texture, allowing you to create safe, durable environments for reptiles, amphibians, and fish.
Our beginner-friendly guidance covers every step: building lightweight foam cores, applying ConcreteClay™ in manageable layers, carving stone or wood textures, and painting your finished work using Colour Fix™ mixed with pigments — which not only adds natural colour but also seals the surface for long-term use. Whether you want a rainforest-style backdrop, a rocky desert environment, or a simple decorative structure, ConcreteClay™ helps you achieve high-quality results at home.
Create habitats that look natural, function well, and reflect your personal style — with all the support you need along the way.
No products found.
Create Custom Terrarium and Aquarium Backgrounds with ConcreteClay™
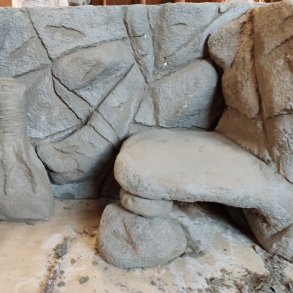
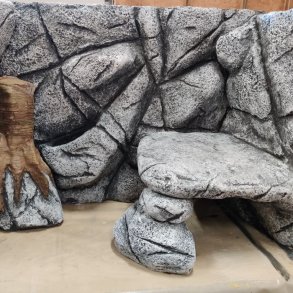
Designing your own 3D background allows you to create a bespoke habitat that perfectly suits your animals' needs. Whether you are constructing rugged rock formations, intricate tree roots, or coral-inspired structures, ConcreteClay™ provides the versatility and durability required for aquatic and terrestrial environments.
Essential Materials
For a robust and professional result, ensure you have the following items:
- ConcreteClay™: Approximately 18 kg of concrete covers 0.9 m² at a 1 cm thickness. Plan for a 1–2 cm layer across the entire surface, accounting for additional depth from protrusions and caves.
- Support Structure: Polystyrene/Styrofoam boards, PU-foam (for assembly), and wooden skewers for securing components.
- Surface Preparation Tools: Heat knife, heat gun, utility knife, and a wire brush for refining shapes.
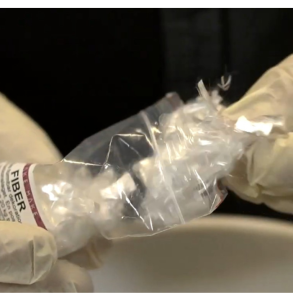
- Concrete Additives: Fibre (added to the first layer for structural strength).
- Finishing & Colouring: Colour Fix™, pigments (e.g., black, grey, white), rubber gloves, mixing buckets, drill mixer, mason’s trowel, and brushes/sponges.
Step-by-Step Construction Guide
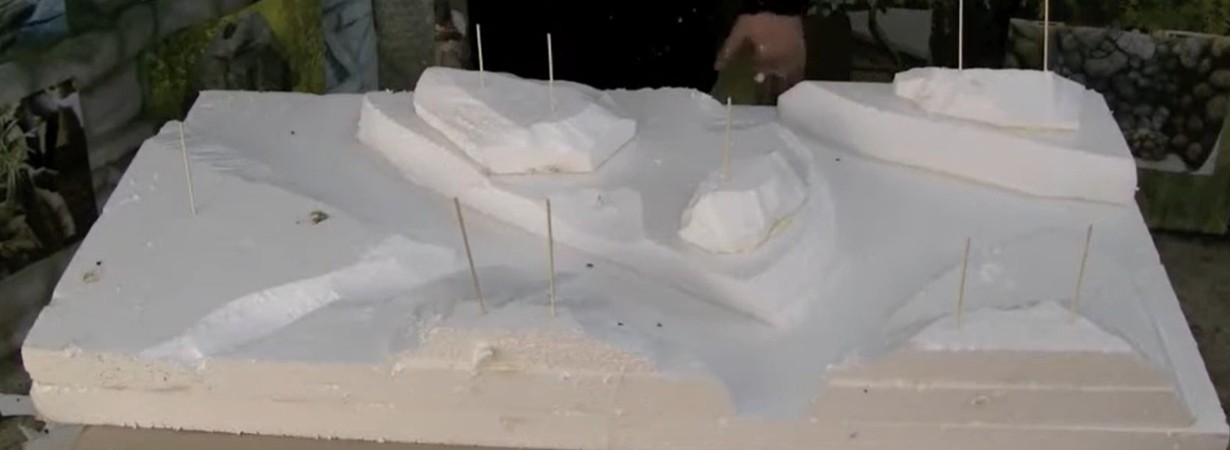
1. Designing the Foundation
Start by measuring your aquarium or terrarium. Cut the polystyrene boards to size. If you want specific protrusions (for reptiles to rest on) or caves (for fish shelter), build these out of additional polystyrene.
- Assembly: Use PU-foam to glue pieces together. Lightly mist the surface with water before applying the foam to speed up curing. Use skewers angled from different directions to fix the pieces in place until the foam sets (approx. 20 minutes).
- Refinement: Once the basic shape is assembled, use a wire brush, heat gun, or hobby knife to round edges and create natural contours. Note: It is easier to add material than to remove it, so carve conservatively.
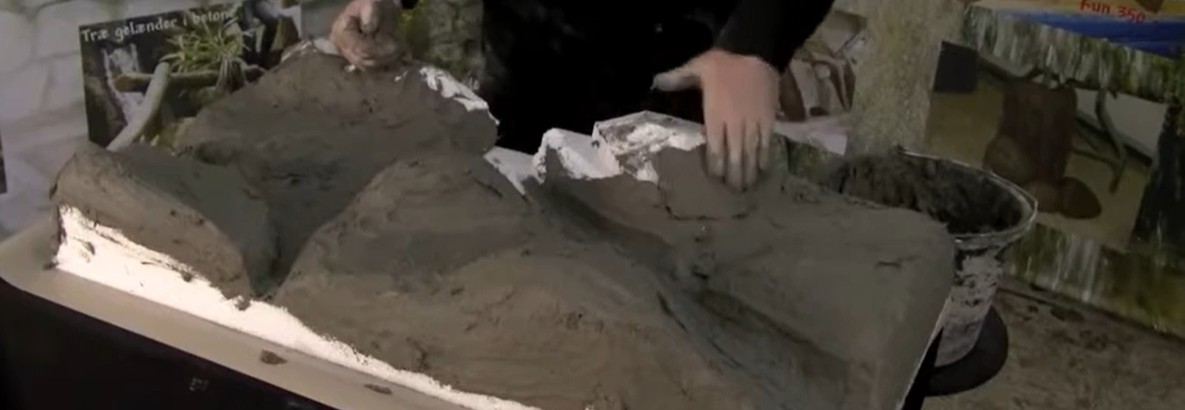
2. The Structural Layer (Reinforcement)
Mix ConcreteClay™ with water (approx. 1 litre of water per 5 kg of concrete) and add fibre.
- Application: Apply a 0.5–1 cm layer by hand, pressing firmly onto the polystyrene. Keep the surface rough to improve adhesion for the next layer.
- Curing: Mist the wet concrete with water and cover it with plastic to maintain moisture. Let it cure until the next day to prevent shrinkage cracks.
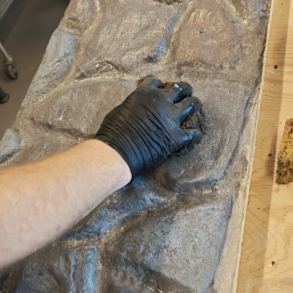
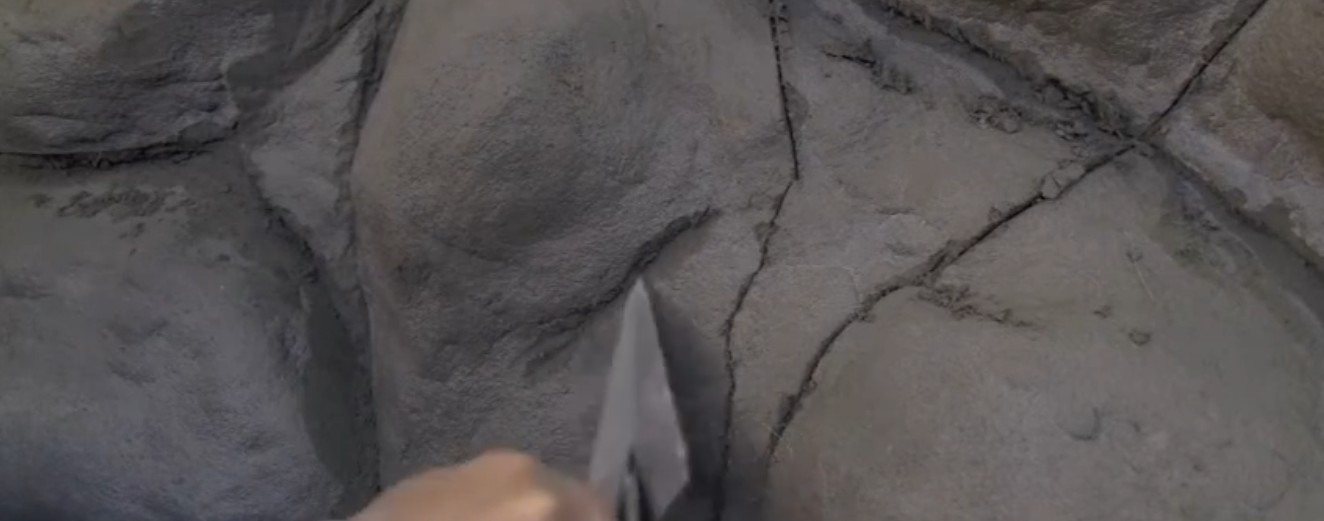
3. The Decorative Layer (Detailing)
Apply a second layer of ConcreteClay™ (without fibre) to create a smooth, consistent base for detailing.
- Structuring: Use a stiff brush to tap the surface, ensuring a uniform texture and removing fingerprints.
- Carving: While the concrete is fresh, use the tip of a trowel to lightly score natural crack lines. Wait 2–7 hours until the concrete begins to crumble when scratched; this is the optimal time to carve deep, realistic cracks and crevices.
- Final Cure: Mist with water and allow to dry until the following day.
4. Painting and Sealing
Once the concrete has dried (minimum 24 hours), it is ready for colouring.
- Base Coat: Mix black pigment with Colour Fix™ and paint the entire background. Colour Fix™ acts as a powerful binder and sealant; it is absorbed into the concrete, sealing it against water and ensuring the pigments do not peel or flake off.
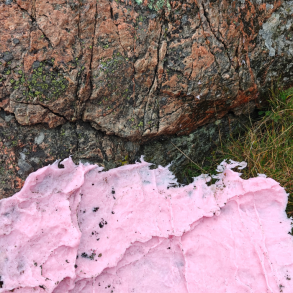
- Highlighting: Gradually build depth by dabbing on lighter shades (dark grey, then lighter grey) with a sponge. Focus on the protruding surfaces, leaving the deep crevices black to emphasize shadow and natural depth.
- Final Drying: Let the finished structure dry thoroughly at room temperature for a few days before placing it into your aquarium or terrarium.
This method allows you to mimic the natural habitat of any species. By researching your animals' native environments and using ConcreteClay™ to replicate those textures, you create a professional-grade, functional, and visually stunning habitat.