.jpg)
Home
Transform Your Walls with MakeMake® ConcreteClay™ — Natural Stone, Texture & Custom Design Made Simple
MakeMake® ConcreteClay™ makes it easy for anyone to upgrade their home with unique, durable wall surfaces — even without prior construction or sculpting experience. Whether you want the look of natural stone, carved textures, or an artistic feature wall, ConcreteClay™ can be applied directly onto existing walls and shaped by hand or with silicone stamps. Our guides walk you through the entire process, from preparing the wall and applying the material to carving details and creating a professional finish.
Using ConcreteClay™, you can build everything from rustic stone walls in the living room to smooth, organic surfaces with sculptural elements. Once your wall is shaped, mix Colour Pigments with Colour Fix™ to create concrete paint. This blend not only gives a natural, beautiful colour finish — it also seals the surface, making it strong, washable, and long-lasting.
And while walls are where ConcreteClay™ truly shines, the same techniques can be used to create custom home décor pieces such as candleholders, trays, vases, shelves, or sculpted elements on furniture. With step-by-step guidance and beginner-friendly workflows, you can achieve professional-quality results throughout your home — at your own pace.
No products found.
How to Create a Bespoke Stone Wall with ConcreteClay™
Creating a custom, textured stone wall is an excellent way to add character and depth to any room. By applying ConcreteClay™ directly onto your walls, you can achieve an authentic stone finish that is both durable and visually striking. Whether you are aiming for a rustic, rugged look or a sophisticated, refined design, this guide will walk you through the process from preparation to the final artistic finish.
Essential Materials
For a project of this nature, quality and preparation are key. Ensure you have the following items ready:
- ConcreteClay™: As a general rule, calculate for 18 kg of concrete per 0.9 m² at a thickness of 1 cm. Depending on the depth of the desired texture or the relief of your silicone stamps, you may need to apply a thicker layer.
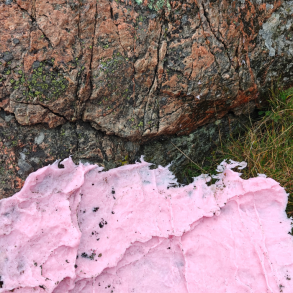
- Mouldable Silicone: Essential for creating custom silicone stamps. You can create your own unique stamps from natural elements such as bark, stone, masonry, or rock formations to ensure your wall is truly one-of-a-kind.
- Colour Fix™ & Pigments: Colour Fix™ is a diffusion-open, water-based binder specifically designed to work with ConcreteClay™. It prevents paint from peeling and ensures the surface is easy to clean. One litre typically covers 8 m², though this depends on the surface porosity and texture depth.
- Tooling: Floor covering, high-quality rubber gloves, a bucket, a drill mixer (or similar), a mason’s trowel, sponges, and various brushes.
Comprehensive Step-by-Step Guide
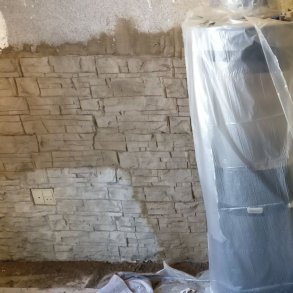
1. Surface Preparation
To ensure the concrete adheres properly, start by removing all wallpaper, dust, and loose debris. A clean, rough surface provides the best mechanical key for the ConcreteClay™.
.jpg)
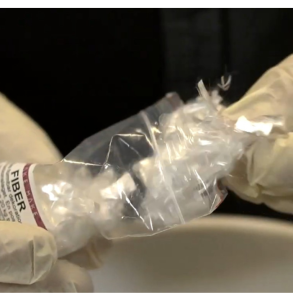
2. Mixing and Consistency
Mix your ConcreteClay™ with water (a standard starting ratio is approximately 1 litre of water to 5 kg of concrete).
The Pro-Approach: Experiment with the water ratio to achieve your desired consistency. A softer, more malleable mix is ideal for faster application, while a firmer mix is better for detailed carving and holding deeper impressions. Always wear protective gloves.
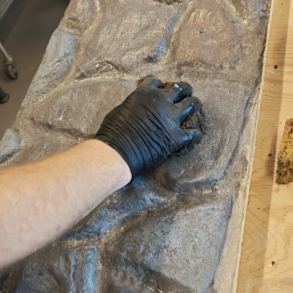
3. Application and Texture
Work in sections that you can comfortably complete before the concrete begins to set.
- Application: Spread the concrete evenly across the wall using a trowel.
- Texture Technique: Wait until the concrete has reached a "leather-hard" state before applying your silicone stamps. If the surface is too wet, the concrete will cling to the stamp, ruining the impression. If necessary, lightly dab the surface with a paper towel to remove excess moisture before stamping.
- Refinement: Once the initial impression is made, you can spend the next 4–8 hours refining the details using small brushes, spatulas, or carving tools to add natural imperfections and realistic depth.
.jpg)
4. Curing and Painting
While the concrete will be ready for painting within 24 hours, it will continue to harden for approximately one week to reach its full structural strength.
5. Advanced Painting and Highlighting
The secret to a professional finish lies in the layering of colours.
- The Foundation: Start by painting the entire wall in a base colour, ensuring you get full coverage in the deepest recesses.
- Building Depth: Use a sponge to dab lighter colours onto the surface. Gradually reduce the area covered with each lighter shade to create realistic shadows and highlights.
- Dry Brushing: For the final, crisp details, use a stiff-bristled brush. Take a small amount of Colour Fix™ mixed with pigment and brush the majority of the paint off onto a piece of newspaper or cardboard. With the brush nearly dry, lightly skim it over the highest points of the texture. This technique accentuates the stone’s ridges and gives the wall a natural, weathered appearance.
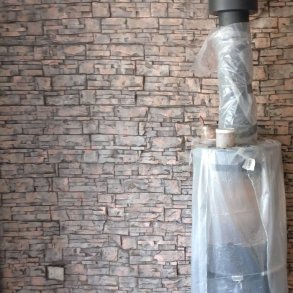
Once completed, you will have a unique, durable feature wall that showcases your craftsmanship. It is a transformative project that invites conversation and adds a unique aesthetic to any home environment.
.jpg)